Sawing a Hollow Core Door to Length
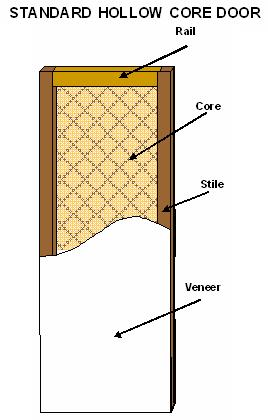
A hollow core door typically consist of two pieces of luan plywood or hardboard (Masonite) that make up the veneer or door face. Glued between them is a solid wood frame around the perimeter, (the side pieces are called stiles and the top and bottom pieces are called rails) and a honeycombed cardboard core which supports the center of the door. Sawing as little as 1-1/4 inches from the bottom of a hollow core door may be enough to completely remove the bottom rail, exposing the hollow areas between the door veneer.
With the hollow core door laying securely across saw horses or other supports, carefully measure and mark each side at the desired length. Using a straight edge aligned with the marks, draw a line across the door. This is the cut line. To prevent splintering of the door veneer during sawing 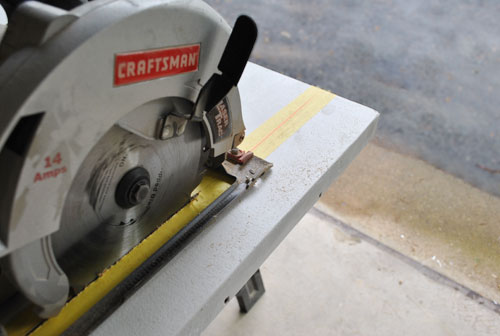 place a piece of masking tape centered directly over the cut line. If the cut line does not show through the tape clearly enough, make new marks on the tape and redraw the cut line on the tape. To further reduce the risk of splintering the veneer face, use a razor knife and a straight edge to score through the surface of the veneer along the cut line. If the cut will be made using a circular saw, the hollow core door is now ready to be sawed. If the cut will be made with a jig saw or hand saw flip it over and make another taped cut line following the same steps listed above. Saw the hollow core door to length using the cut line as a guide and sawing slightly to the scrap side of the cut line.
If the hollow core is exposed, a new bottom rail must be installed to maintain the integrity of the door. Carefully measure the distance between the face veneers and the length between the stiles. Rip a piece of wood (a 2×4 stud is an economical source) to the 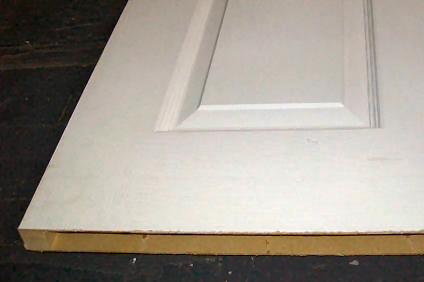 thickness measured between the face veneers and then saw it to length (distance between the stiles)
Enough cardboard core material must be removed from the hollow core to allow the new rail to be inserted. Use a sharp chisel or knife to separate the cardboard from the door face veneers and fold it back into the cavity. Test fit the rail by inserting it into the hollow area at the bottom of the door. It should be a close fit but not so tight that it binds as it will need to be removed for gluing. Once the fit is acceptable, it is ready to be glued in place. Carefully remove the rail. If the fit is too snug for easy removal or if it binds, insert a 1-1/4 inch long screw near each end of the rail leaving about half the screw exposed. The exposed screws can now be used to pull the rail from the door cavity.
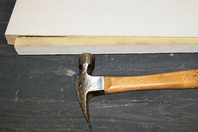 Use a small (½ inch wide) brush to apply carpenters wood glue to the inside of the luan face veneers and to the sides and end of the rail. Insert the rail back into the door cavity. A block of wood may be used to tap it into place, being careful not to tap it too far into the cavity.
With the rail in place use several clamps to hold the face veneers tight to the rail until the 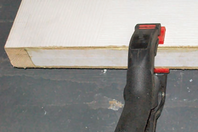 glue has dried. Using scrap wood as a spacer between the luan veneer and the clamp faces will prevent damage to the veneer and also spread the clamping force over a larger area. Use a damp cloth to wipe away excess glue before it dries. Leave the clamps in place until the glue has set according to the recommendations on the glue bottle.
When the glue has fully set remove the clamps, sand the repaired area and apply the desired finish. The hollow core door is now ready to hang.
Did you enjoy this post? Tell us what you think in the comments box below.
Want to see more?
Subscribe to our RSS feed or Subscribe by e-mail
Wood’s Home Maintenance Service offers solutions for a wide range of building, maintenance and repair needs. Give us a call or click the button below to contact us today for a free estimate.



Thanks, this is just the information I was looking for!
Yes! This was tremendously helpful! I am using a hollow core door to make a counter top over my washer and dryer. I sawed off the bottom edge and realized I was going to have to reinforce it. I had the idea to put a piece of wood in it, but wasn’t sure if I was right. Was so happy to read your blog to find out the best way to do it. Now all I need to do is figure out how to fill the door knob hole!
You are very generous to share. I appreciate the effort you put into this post. Thank you.
We are glad you found it helpful!