
Laminate Flooring Installation
Should you install it yourself or hire a pro?
This guide may help you decide.
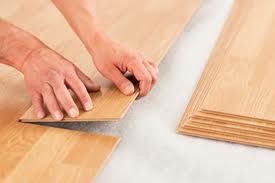
laminate flooring
When deciding if installing laminate flooring is a project you can tackle on your own, there are a few important considerations. This project will require a significant amount of time, labor and money to properly complete. Modifications to your home such as removing and replacing shoe moldings and thresholds are usually required. Door jambs and casing must be sawn off (under-cut) to allow the laminate flooring to extend underneath and sometimes doors must be shortened to provide proper clearance. Angled walls, fire place hearths, floor registers, appliances and protrusions such as water pipes or cable wires present additional challenges. Many laypersons posses the skills necessary to successfully install laminate flooring, however if the project turns out badly not only are you out the time and money already invested, but the value of your home may be negatively impacted as well. Improper instillation may also void your laminate flooring warranty.
Can you answer yes to all these questions?
- Can I read a measuring tape and make accurate measurements and cuts?
- Do I have a clear understanding of the overall process including prep work, installation of the laminate flooring and trimming out the finished floor?
- Do I have adequate skills to complete all required work?
- Will I be able to adequately interpret and follow the installation instructions ?
- Do I have the proper tools to complete all required work?
- Do I have proper training in the safe use of the required power tools?
- Do I have sufficient time to complete all required work?
- If I make a mistake during installation will I be OK with it or will it always bother me?
If you answered yes to all the questions the following information should help ensure a successful outcome.
Installing laminate flooring requires some basic carpentry skills including the safe use of power tools. Other than that the most important thing you can do is follow the installation instructions. Lowes and Home Depot often offer installation seminars that might be helpful. Your installation will go much easier and faster and look much more professional if you have the proper tools.
For sawing the laminate flooring and the shoe molding you will need:
- Measuring tape
- speed square, tri-square or framing square
- Chop saw (a jig saw or circular saw may be used but the quality of cuts will suffer)
- Table saw (a jig saw or circular saw may be used but the quality of cuts will suffer)
- optional ~ scroll saw or band-saw (a jig saw may be used instead)
- Coping saw (for the proper installation of shoe molding)
For under-cutting door jambs and casing you will need:
- Under-cut hand saw
or
- Oscillating saw with offset blade (will increase speed and quality of cuts)
For installing the flooring you will need:
- Rubber mallet
- Tapping block (notched to fit flooring)
- Pull bar (specialty tool available where laminate flooring is sold)
- 1/4″ spacers
For installing the transition strips you will need:
- Metal snips
- Power screw driver or impact driver
For installing the shoe molding you will need:
- Carpenters trim hammer
- Nail set
or
- Pneumatic brad nailer (greatly increases speed and quality of installation)
- Air compressor and hoses
A chop saw is the fastest way to make the many square cuts necessary to complete the project. A small table saw will increase production but a jig saw or circular saw may be used instead. You will likely also need to make some cuts that require a jig saw or scroll saw. The door jambs and casing must be undercut to facilitate proper installation. There is a small triangular double edged hand saw available for this but if you have many door jambs an oscillating saw with an offset blade will save a tremendous amount of time and labor.
Preparation is a must!
Prep work is essential for a successful outcome. If the area to be floored has carpet, it along with the padding must be completely removed. Carpet cleat strips must be removed and all nails either pulled out or driven down. All staples used to secure the carpet padding must be removed or driven flush. Bits of foam carpet padding trapped under staples should be completely removed.
Walk back and forth over the entire floor several times while listening for squeaks. Now is your last best chance for eliminating squeaks by nailing or screwing down the sub-floor to the floor joists. Check for any loose or raised nails. If a nail has raised up it is not holding the sub-floor down and will just raise up again if you drive it back down. Instead remove it and replace it with a wood screw that is slightly larger in diameter and about the same
length.
Clean and vacuum the sub-floor completely prior to beginning installation and as often during installation as need to maintain a clean work area. It is not critical that the sub-floor be spotless but chips of wood or laminate, pebbles or any other debris may cause the laminate flooring not to lay or fit properly.
Determine if a vapor barrier is required and install if needed. A combination all in one padding/vapor barrier is available if your project requires both.
Laminate flooring should be installed over a padding. This makes it quieter and more comfortable to walk on. Many laminate flooring styles are now available with the padding attached. If the style you choose does not have the padding attached you must install padding before the laminate flooring is installed.
laminate flooring is a “floating floor”
Laminate flooring is said to float because it is not fastened to the sub-floor. All the individual pieces interlock into one sheet that lays or “floats” on the sub-floor. When properly installed it should have a gap of approximately 1/4 inch from the walls of the room on all sides. The gap is not visible because it is covered or “trimmed out” with shoe molding. This allows the laminate floor to expand and contract with changes in temperature and humidity.
At doorways the door jamb and casing is undercut the thickness of the flooring to allow the flooring to project underneath so that the raw(cut) edges are hidden. Transition strips, which hide the raw edges of flooring, are used in doorways or anywhere else one type of flooring meets another.
Don’t create problems
Laminate flooring tends to buckle and rise up when the flooring is prevented from expanding because of any combination of the following:
- no perimeter gap
- shoe molding installed too tight
- shoe molding nails driven into laminate
- laminate flooring projecting too far under door jamb (leaving no gap)
- transition strips restraining laminate because it extends too far under strip (leaving no gap)
- transition strip is face nailed through laminate
- face nailing through laminate flooring
Use extra care to ensure the flooring can expand and it will make for a worry free installation later on.
Finish better and save a few bucks
Every laminate flooring comes with accessories like transition strips and shoe molding made specifically for that brand and color. Using their transition strips is the best way to achieve a professional appearance. The same is not true for the shoe molding which is over sized, over priced and comes in short pieces that necessitate too many joints. For a better looking job, seriously consider buying standard pine or oak shoe molding in longer lengths at a fraction of the cost and staining and sealing it to match your flooring.
If installing laminate flooring for yourself seems within your capabilities you may find it very gratifying to look back on the finished project. If it seems a little too daunting a professional installer may be in order.
Wood’s Home Maintenance Service can professionally install laminate, engineered or prefinished solid hardwood floors in one room or your whole home. We offer sequential or turn key project progression. Contact us now for a free estimate!