Repairing a Column Base
Every year we get many requests to repair porch rails, posts and columns. Often when a column’s condition is assessed it is actually just the column base that is damaged. A recent project offered a great example of repairing a column base. This post covers many of the considerations and steps required to effect a long lasting repair of a typical column base
Assessing the condition of the column
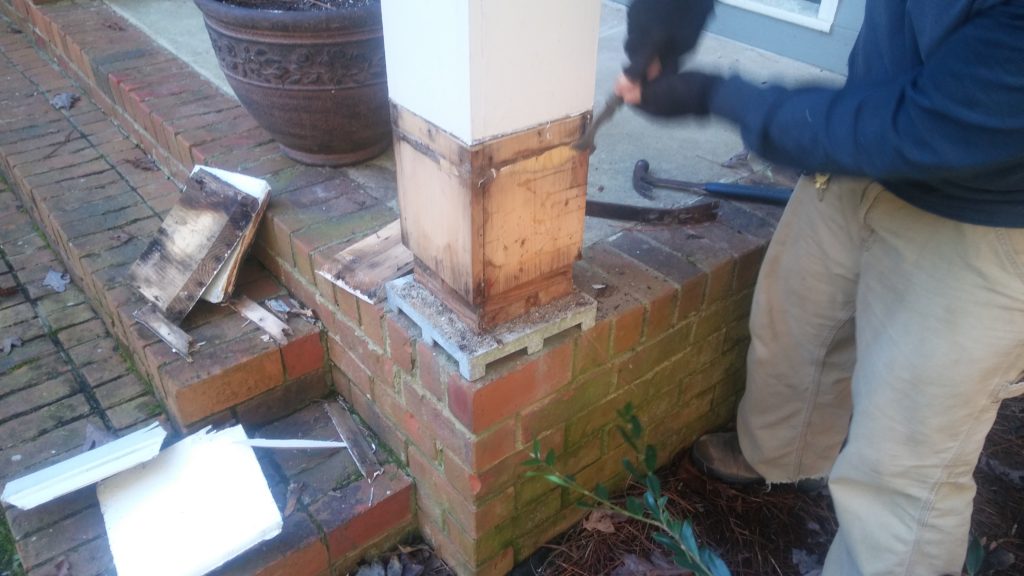
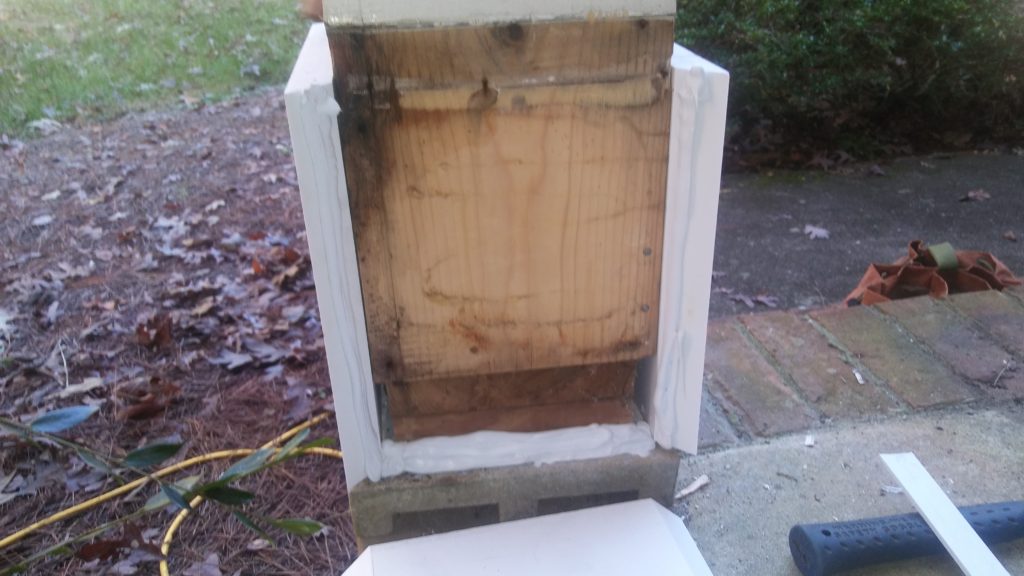
Removing the decaying boards around the bottom of the column revealed it’s condition. There was a very slight softening of the wood in a couple of places caused by prolonged exposure to moisture. The damage was insufficient to compromise the load bearing requirements of the column, but any further damage could start to weaken it.
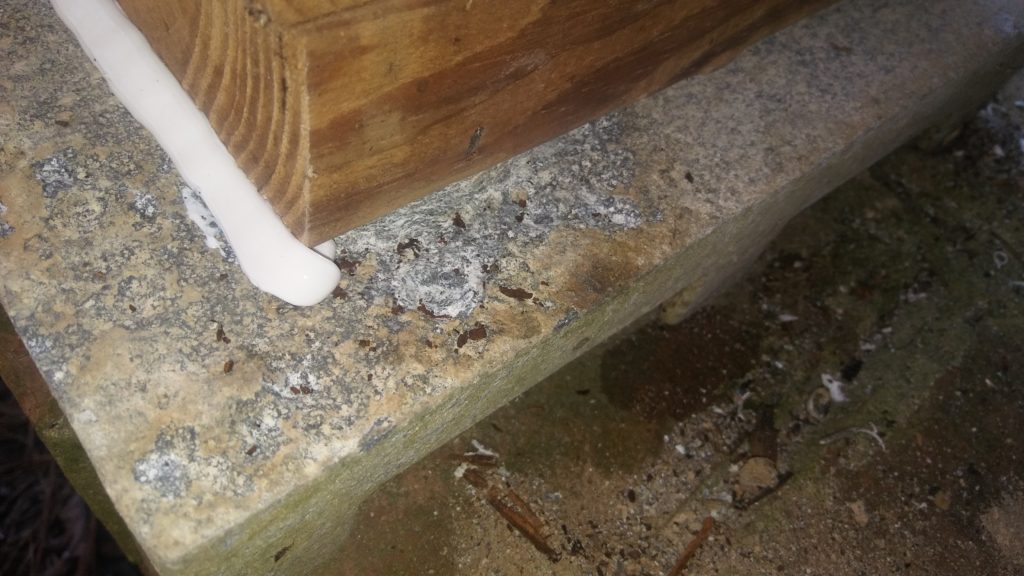
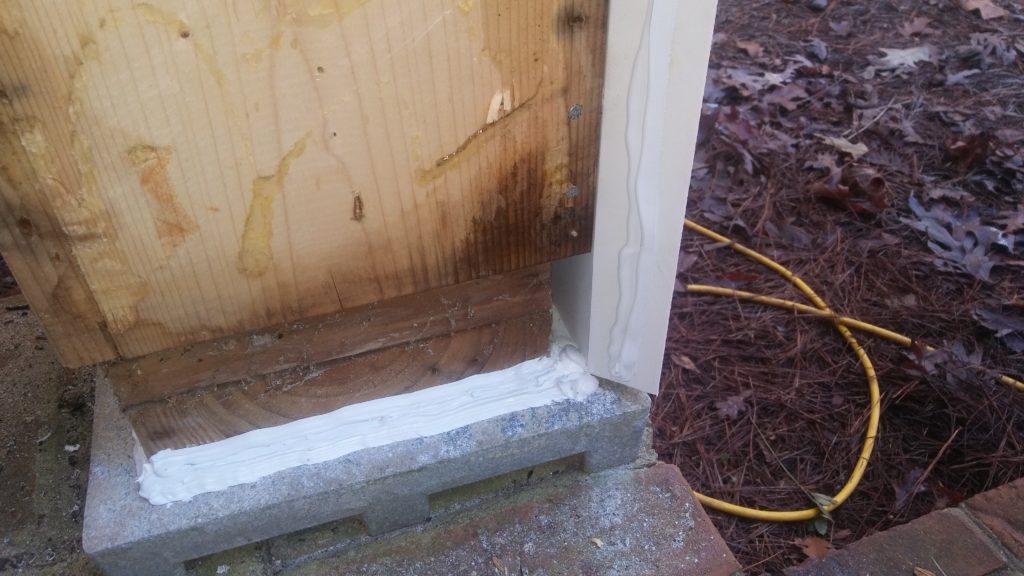
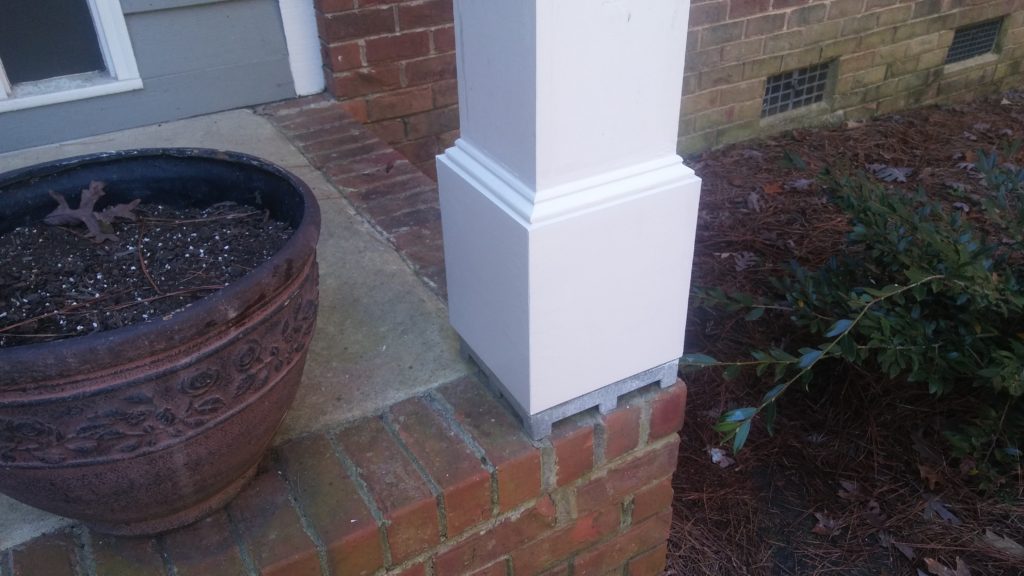
The two blocks of pressure treated wood between the bottom of the column and the aluminum base suggest a previous repair may have been made in which the bottom of the column was sawn off to remove damaged wood or it may have been originally installed that way. Of particular concern was the degradation of the aluminum base caused by galvanic corrosion, an electrochemical interaction between the copper in the pressure treated wood blocks and the aluminum base, that can occur in the presence of excess moisture. Damage to the base can be seen in the photo below in the form of extensive pitting along the edge of the treated wood blocks.
Sensible Solutions
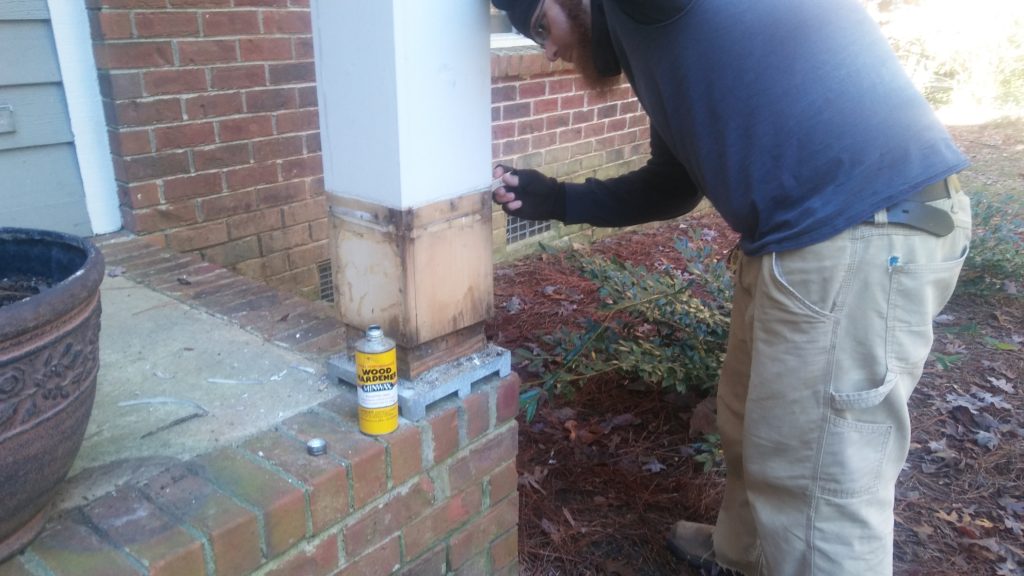
Before the column base is rebuilt the issues of soft wood on the column and the pitting of the aluminum base must be addressed. Although the soft areas of wood have not yet impacted the strength of the column, left untreated, they may absorb and hold enough moisture to allow further decay.
We applied several coats of Minwax Wood Hardener to the soft areas of wood. It has a thin viscosity which allows deep penetration into the wood fibers. As it dries it seals the the wood against moisture penetration effectively halting further decay.
Keeping water from reaching the treated wood blocks will lower the moisture content enough to prevent continued corrosion of the aluminum base. This is accomplished in three steps. The first step consists of applying a liberal bead of caulk around the base of the treated blocks to prevent water from reaching them from beneath the base trim boards. It is also important to leave a slight gap between the non-load-bearing trim boards and the aluminum base. This will allow air circulation and quick drying of this vulnerable area.
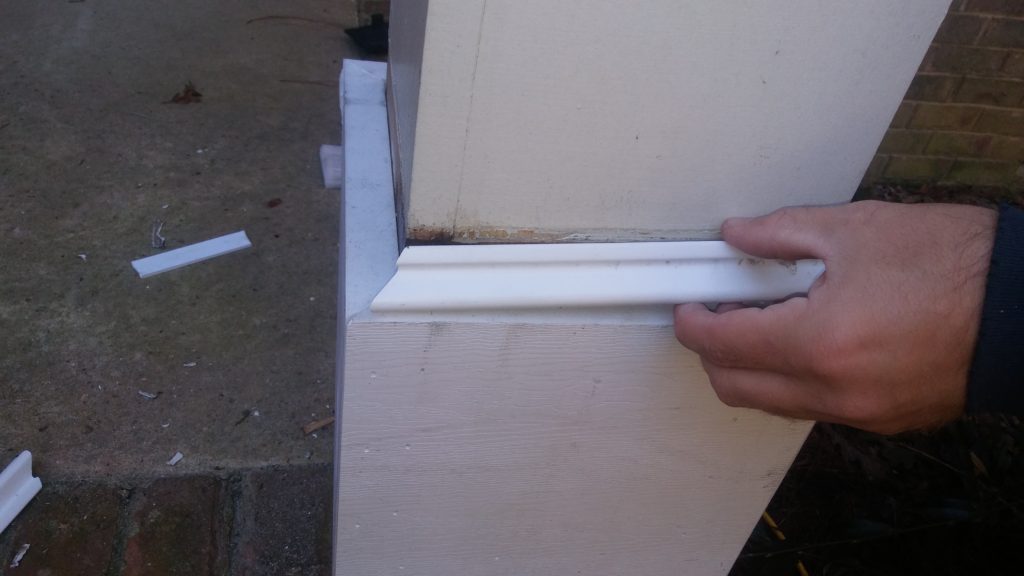
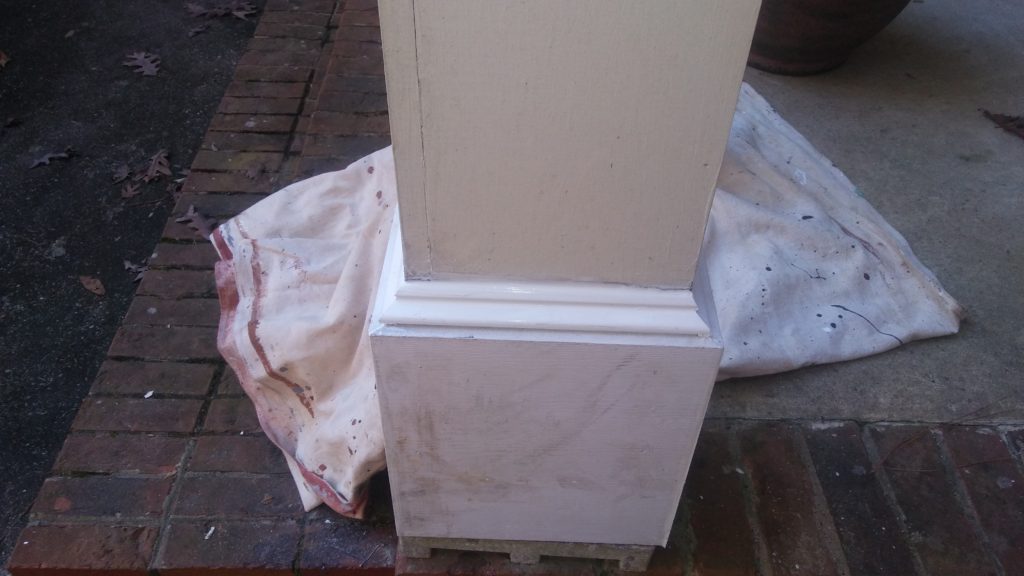
The next step is choosing a good material for the base and trim . Azek trim boards or any similar PVC trim boards are among the best choice for repairing a column base and was our choice for this project. We used a 5/4 (full one inch thick) by 11-1/4 inch wide PVC trim board for the base and PVC base cap to trim out the top of the column base.
The final step is ensuring the column base is properly sealed. We applied a liberal bead of caulk on each mitered corner of the trim boards as they were assembled.
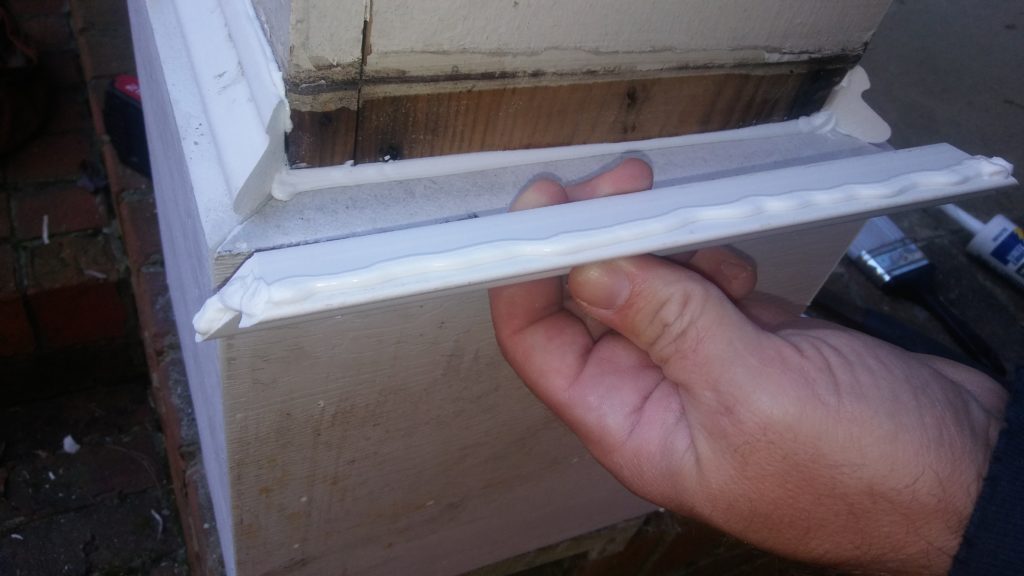
Once the column base boards were installed a bead of caulk was applied around it’s top edge and the base cap was seated into it (forming a gasket like seal). Caulking was also applied to the back edge of the base cap before it was pressed in place (yet another gasket like seal). Finally the top edge of the base cap was surface caulked where it abutted the column.
To complete the repair we smoothed all the calk joints and filled the nail holes to prep for painting.
We painted the repaired areas with some Valspar, Duramax brand, exterior paint I brought from the shop. Although not a perfect match, it was close to the color of the column and should suffice quite well until the owners have the house painted in the near future.
Did you enjoy this post? Tell us what you think in the comments box below.
Want to see more?
Subscribe to our RSS feed or Subscribe by e-mail
